视觉任务 做CV的有几大任务,分类,分割,目标检测。在09年ImageNet 发布后,CV进入了迅速发展的年代,从最开始用CNN的一些底层卷积算子做检测,到后面ResNet给训练深度神经网络提供了简洁有效的方法。再到后面对比学习,AutoEncoder提供自监督范式,ViT说明了只要数据够网络参数多再加上有钱,力大飞砖是多么好用。CLIP又用对比学习让我们看到了多模态的可能。在今天VLM已经是学术界和工业界热点中的热点,大家都期待着更深的Transformer Layer,更长的Context Limit,更多的算力,更可靠的Infra,已经AI带来更多可能性的未来。We take inspiration from NLP, where the next token prediction task is used for foundation model pre-training and to solve diverse downstream tasks via prompt engineering
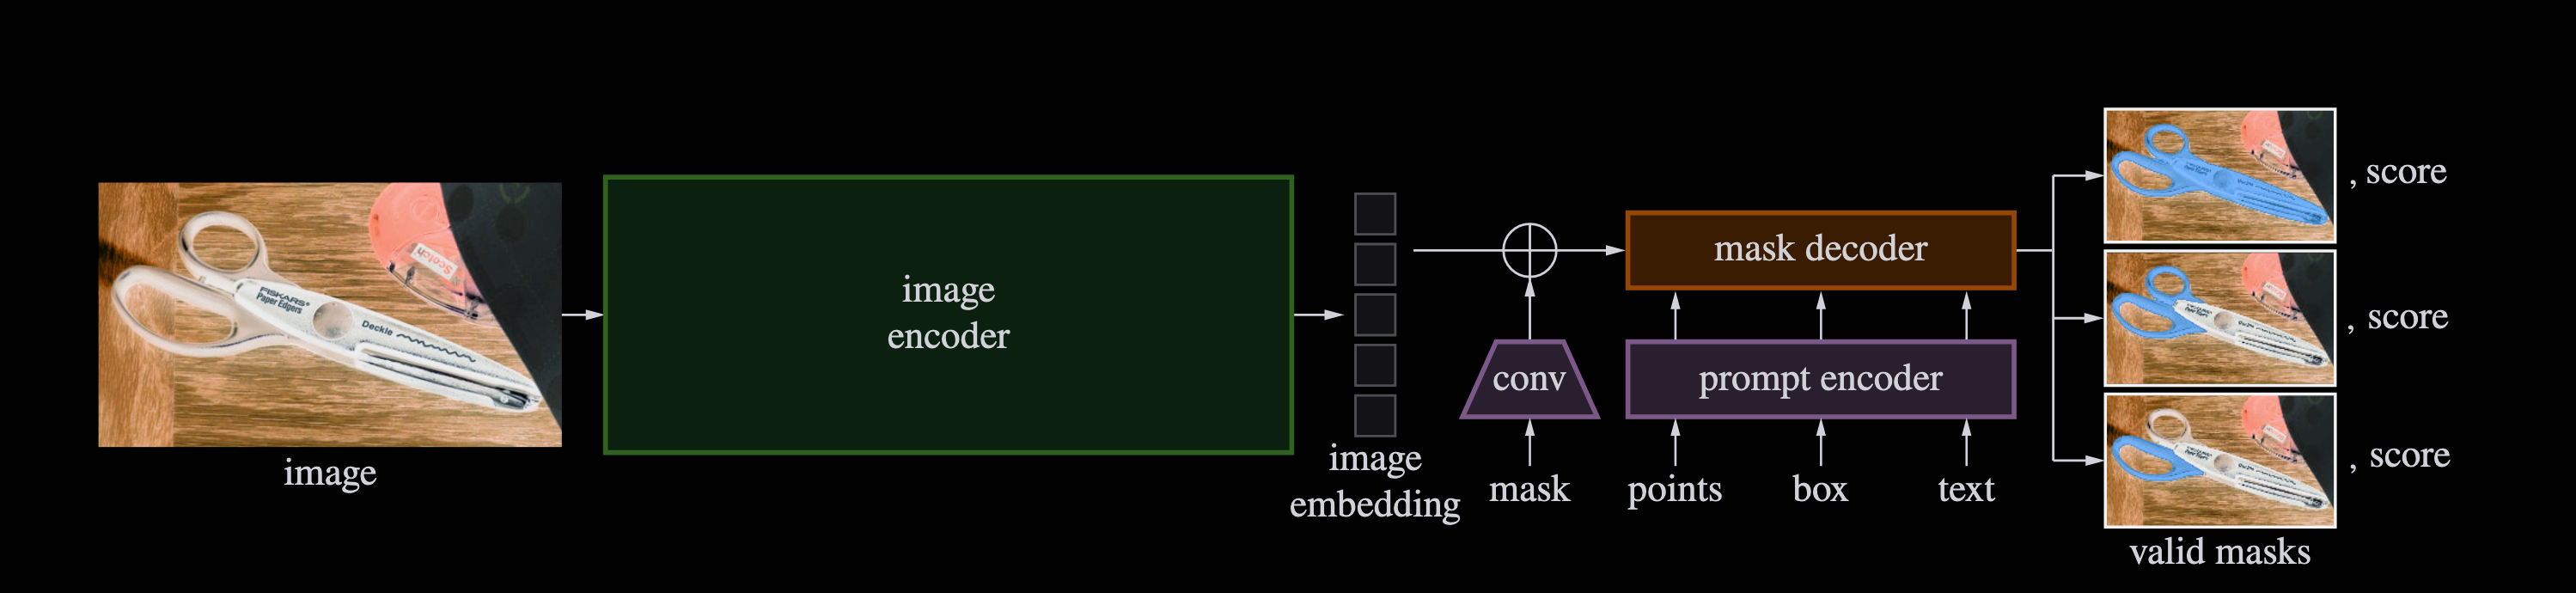
通用语义分割模型 过往大家在CV任务上的思路是尽量从模型结构和训练范式中创新,从而在一些数据集上提点。但是SAM的作者想做的是建立一个较为通用的模型,能够支持可变长prompt,同时能够zero-shot或是简单的fine-tune 就能适配到一些下游任务中。我们着重介绍SAM的模型结构还有一些数据处理,在论文中,作者所在的FAIR团队还开发了一个data engine在不断对模型进行continous training
Encoder SAM的Encoder就是MAE,参数相当于ViT-L,但跟MAE的预训练不同,SAM的Input Size是1024x1024,而MAE是256x256(所以打成patch后MAE有16x16个块,每个块内部16x16个像素点),但SAM的话最后打成patch为64x64。embedding维度为768,最后通过两个卷积层在embedding dim做卷积把维度将为256,所以从image encoder出来的数据就为256x64x64。
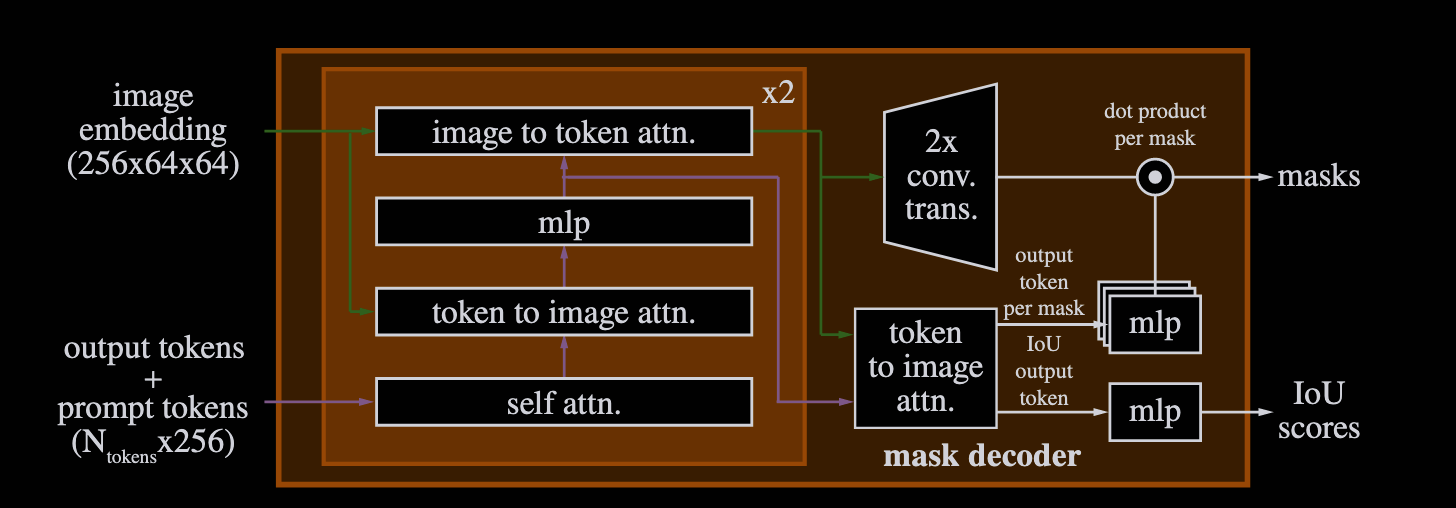
Decoder Decoder主要是通过几次cross-attention,最后生成多个mask和对于mask的score,最后通过upsample得到最终的mask(注意最后upsample之后的图片wxh为256x256,跟原图不一样),所以在实际推理的时候通过插值来放大了ouput_mask。但是实际计算loss的时候是预测的mask,跟ground truth算loss,然后取最小的一张对应的loss梯度回传。
SAM3D 去年底SAM3D 出来可以说是继续超神,效果非常好,让我们看到了在3D场景下做更多视觉任务的可能性。
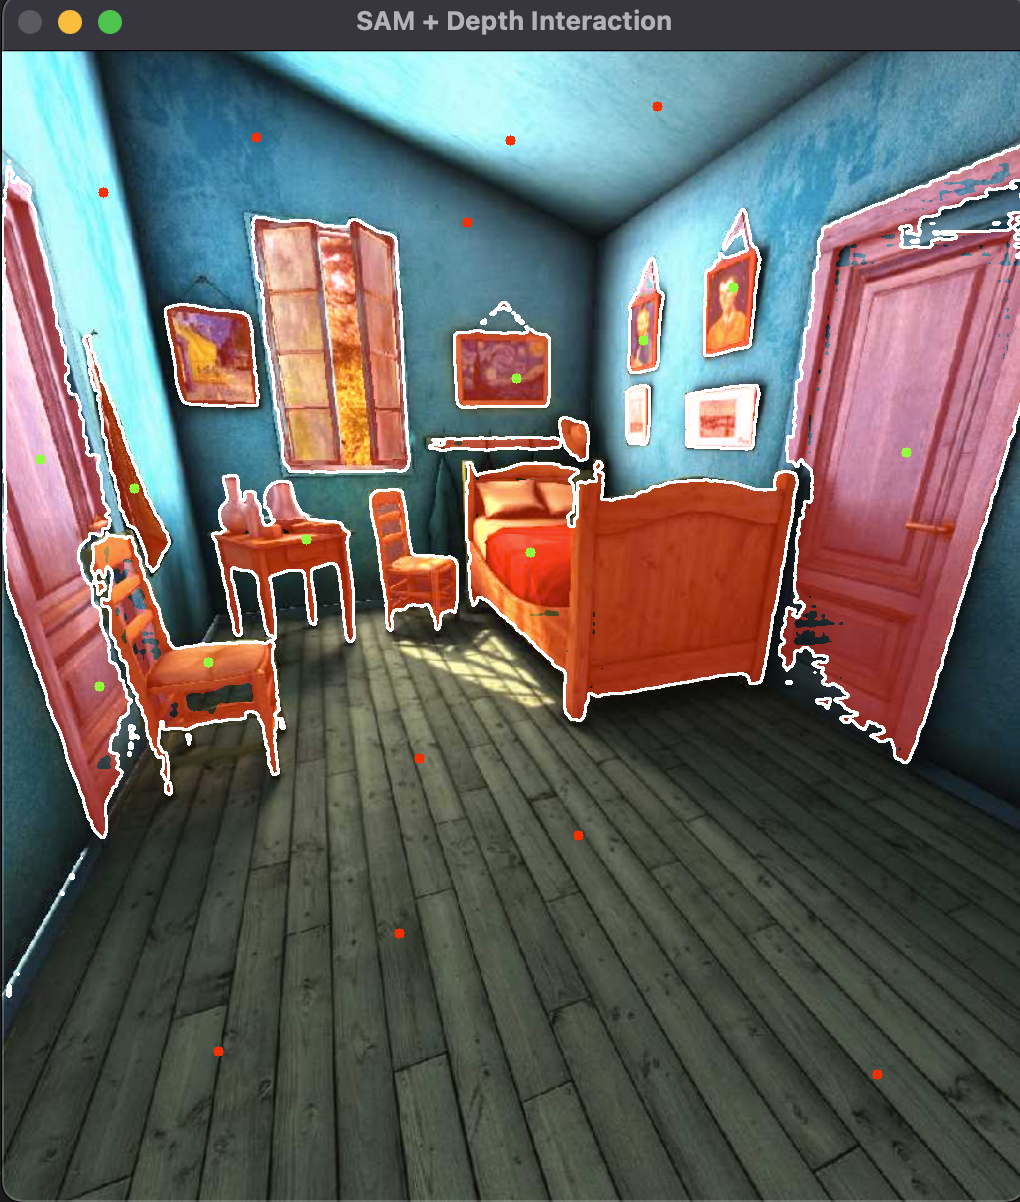
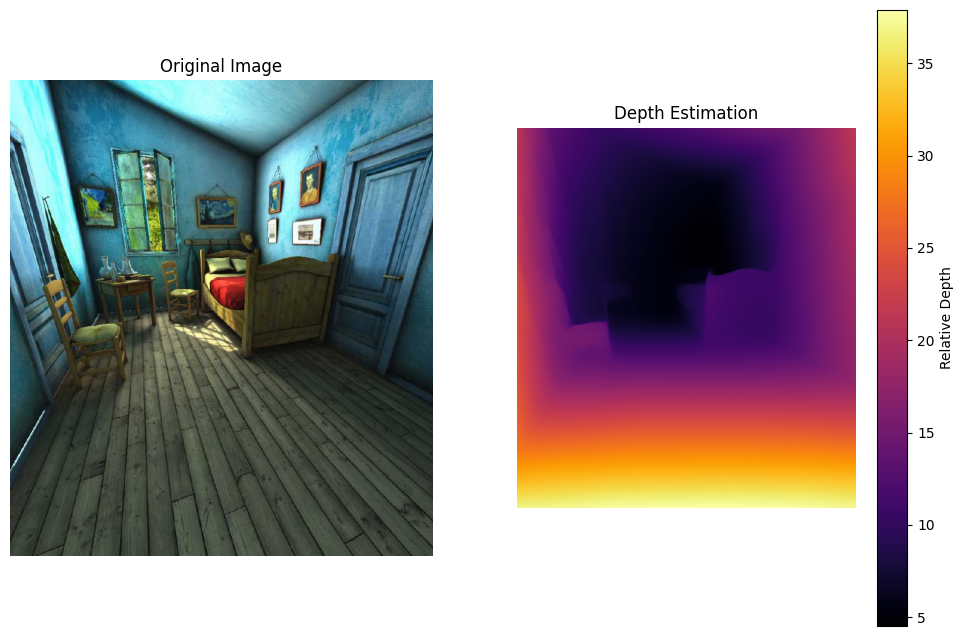
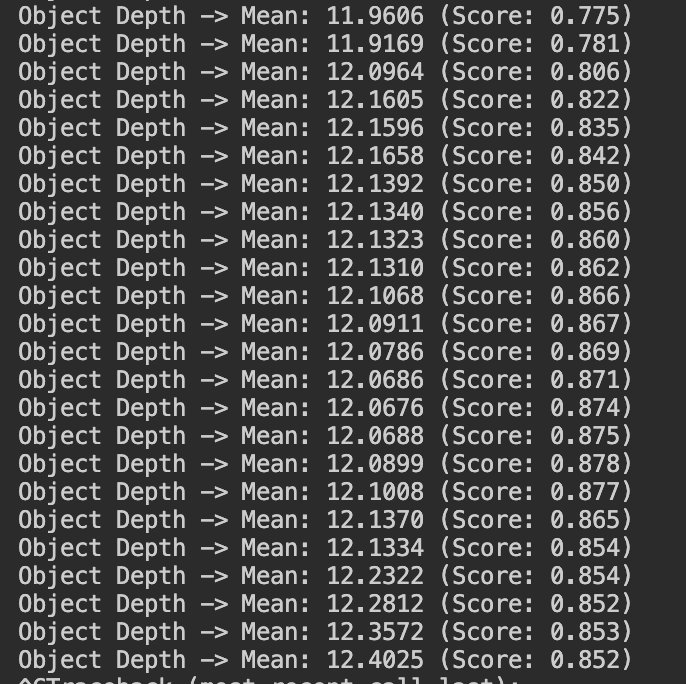
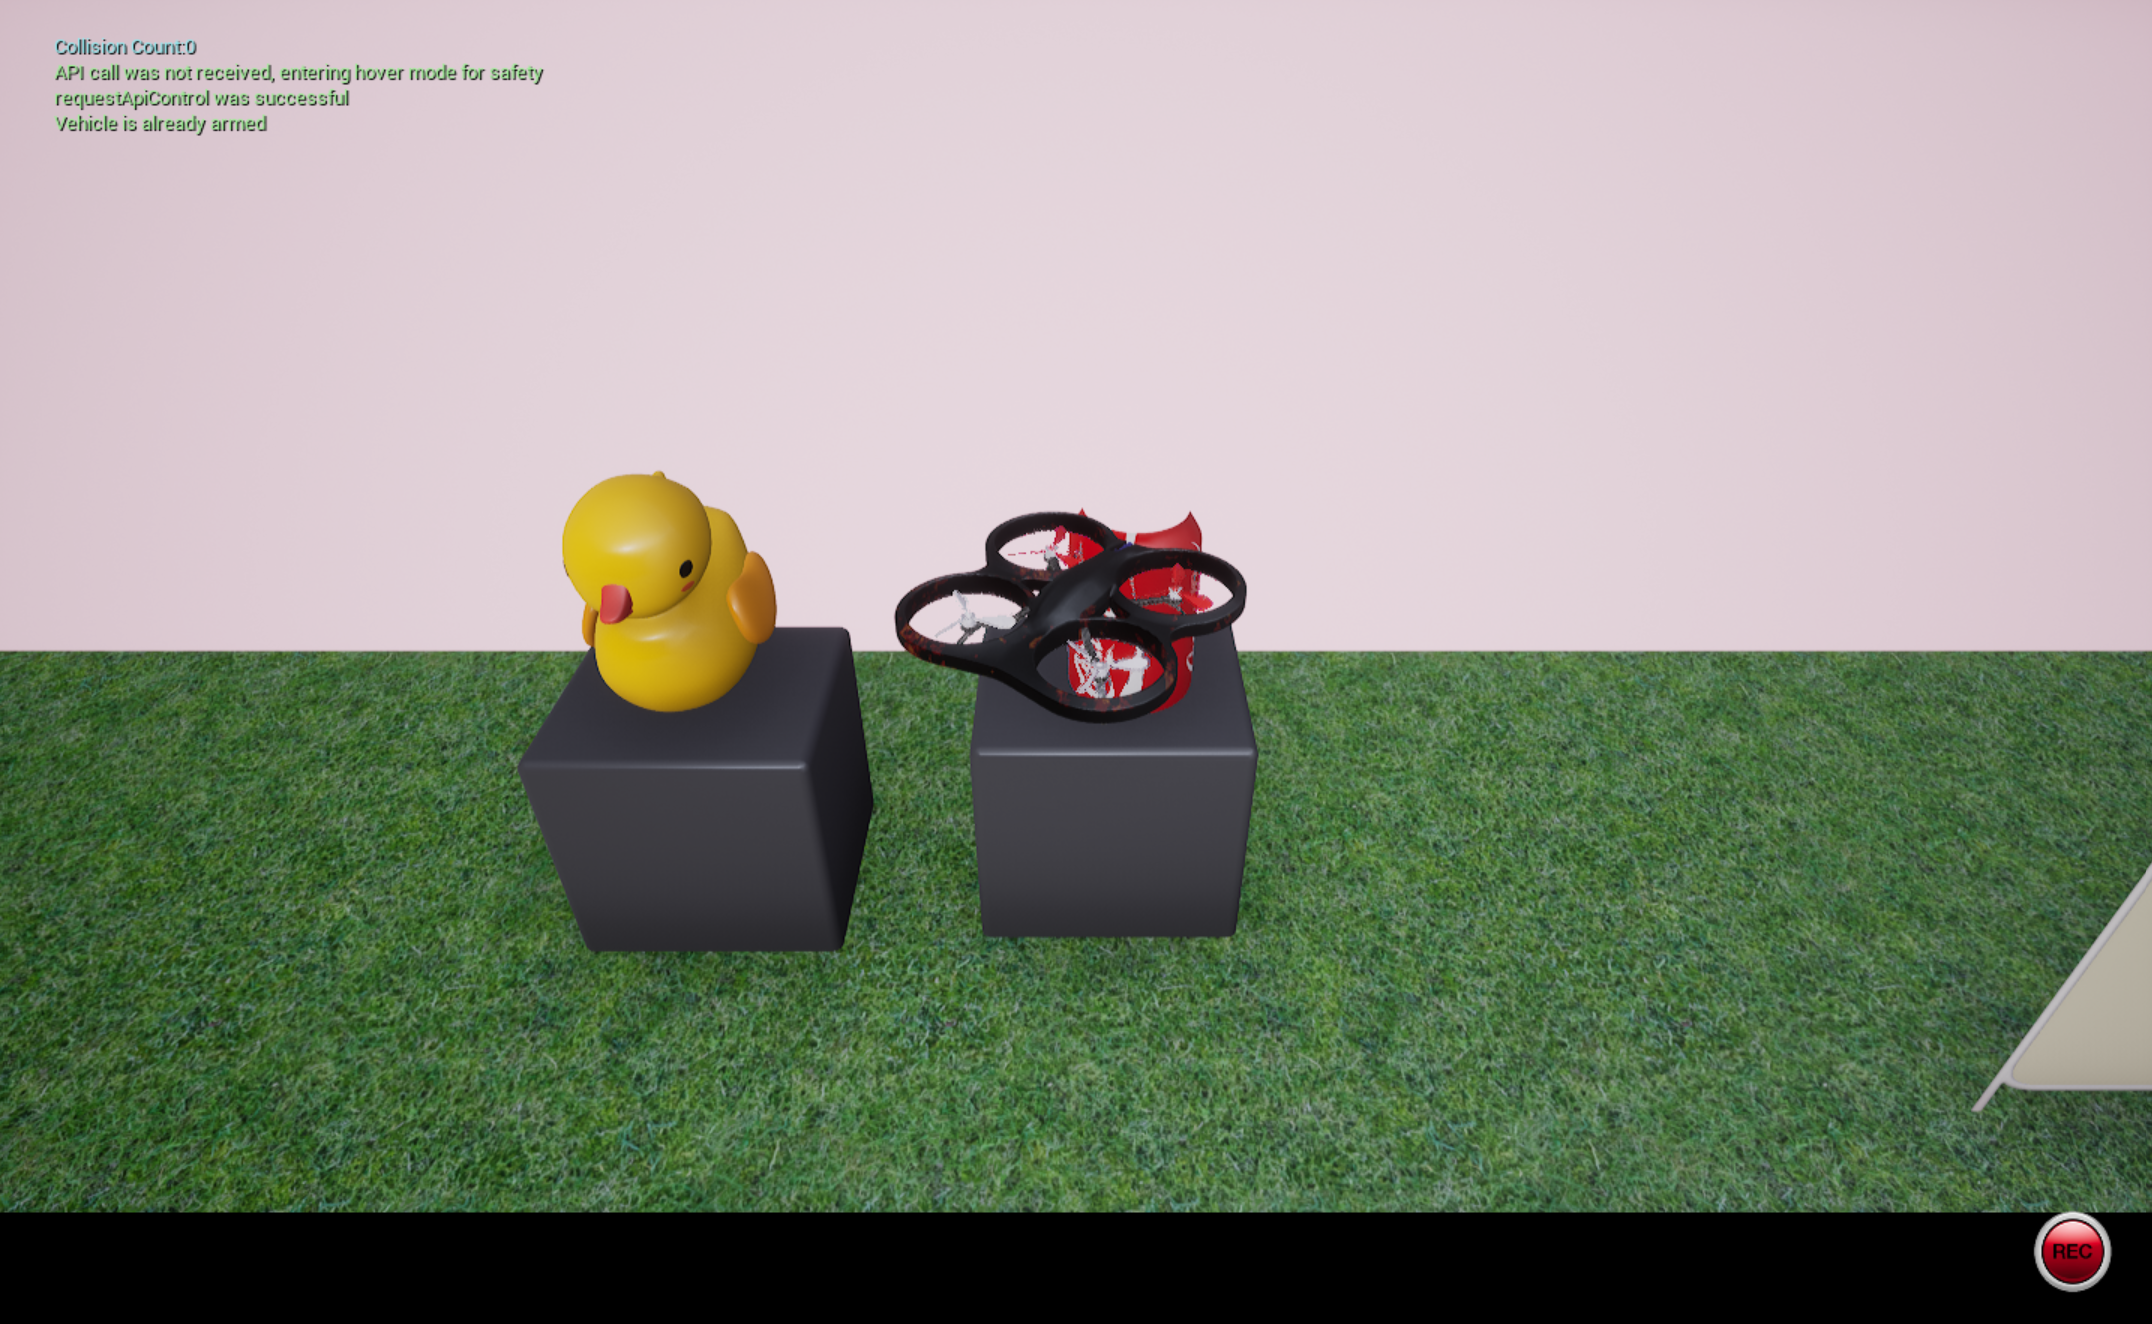
SAM+Depth 根据DataWhale提供的文档,我们可以通过SAM来给单目深度估计以及2D视觉理解赋能,具体来讲,因为SAM可以区分前景和背景,一般来说很多背景都是无穷远距离,同时一些前景的距离是比较近的,这能给深度估计模型提供一些参考。我们这里根据教程仅仅做两者的通过展示并对两个模型理解,而不做深度耦合的具体实现。实验环境依旧是mac无cuda,实际测试后跑推理跟opencv是没有任何问题的。同时对原代码做了部分微调:
1
2
3
4
5
6
7
8
9
10
11
12
13
14
15
16
17
18
19
20
21
22
23
24
25
26
27
28
29
30
31
32
33
34
35
36
37
38
39
40
41
42
43
44
45
46
47
48
49
50
51
52
53
54
55
56
57
58
59
60
61
62
63
64
65
66
67
68
69
70
71
72
73
74
75
76
77
78
79
80
81
82
83
84
85
86
87
88
89
90
91
92
93
94
95
96
97
98
99
100
101
102
103
104
105
106
107
108
109
110
111
112
113
114
115
116
import torchimport numpy as npfrom PIL import Imageimport matplotlib.pyplot as pltimport osimport timefrom transformers import DPTImageProcessor, DPTForDepthEstimationfrom segment_anything import sam_model_registry, SamAutomaticMaskGeneratordevice = "cuda" if torch.cuda.is_available() else "cpu" print (f"使用设备: {device} " )def save_visualization (image, mask_or_depth, mode="sam" , output_name="output.png" ): plt.figure(figsize=(12 , 8 )) if mode == "depth" : plt.subplot(1 , 2 , 1 ) plt.imshow(image) plt.title("Original Image" ) plt.axis('off' ) plt.subplot(1 , 2 , 2 ) plt.imshow(mask_or_depth, cmap="inferno" ) plt.colorbar(label="Relative Depth" ) plt.title("Depth Estimation" ) plt.axis('off' ) elif mode == "sam" : plt.imshow(image) ax = plt.gca() ax.set_autoscale_on(False ) sorted_anns = sorted (mask_or_depth, key=(lambda x: x['area' ]), reverse=True ) img_overlay = np.ones((sorted_anns[0 ]['segmentation' ].shape[0 ], sorted_anns[0 ]['segmentation' ].shape[1 ], 4 )) img_overlay[:,:,3 ] = 0 for ann in sorted_anns: m = ann['segmentation' ] color_mask = np.concatenate([np.random.random(3 ), [0.4 ]]) img_overlay[m] = color_mask ax.imshow(img_overlay) plt.title("SAM Segmentation" ) plt.axis('off' ) plt.savefig(output_name, bbox_inches='tight' ) plt.close() print (f"结果已保存至: {output_name} " ) def main (): rgb_path = "0.jpg" sam_ckpt = "SAM-vit-h/sam_vit_h_4b8939.pth" if not os.path.exists(rgb_path): print (f"错误: 找不到图片 {rgb_path} " ) return image_pil = Image.open (rgb_path).convert("RGB" ) image_np = np.array(image_pil) print ("\n--- [1/2] 正在运行深度估计 ---" ) try : depth_processor = DPTImageProcessor.from_pretrained("Intel/dpt-large" ) depth_model = DPTForDepthEstimation.from_pretrained("Intel/dpt-large" ).to(device) inputs = depth_processor(images=image_pil, return_tensors="pt" ).to(device) with torch.no_grad(): outputs = depth_model(**inputs) predicted_depth = outputs.predicted_depth prediction = torch.nn.functional.interpolate( predicted_depth.unsqueeze(1 ), size=image_pil.size[::-1 ], mode="bicubic" , align_corners=False , ).squeeze().cpu().numpy() save_visualization(image_np, prediction, mode="depth" , output_name="result_01_depth.png" ) except Exception as e: print (f"深度估计失败: {e} " ) print ("\n--- [2/2] 正在运行 SAM 分割 ---" ) if os.path.exists(sam_ckpt): try : sam = sam_model_registry["vit_h" ](checkpoint=sam_ckpt).to(device) mask_generator = SamAutomaticMaskGenerator(sam) masks = mask_generator.generate(image_np) save_visualization(image_np, masks, mode="sam" , output_name="result_02_sam_seg.png" ) except Exception as e: print (f"SAM 分割失败: {e} " ) else : print (f"跳过 SAM: 未找到权重文件 {sam_ckpt} " ) if __name__ == "__main__" : main()
issue ,可能只是在训练的时候利用CLIP encoder做了一些探索,不过有项目lang-sam 进行了实现可以参考